Yard House Chicken Enchilada Stack Recipe
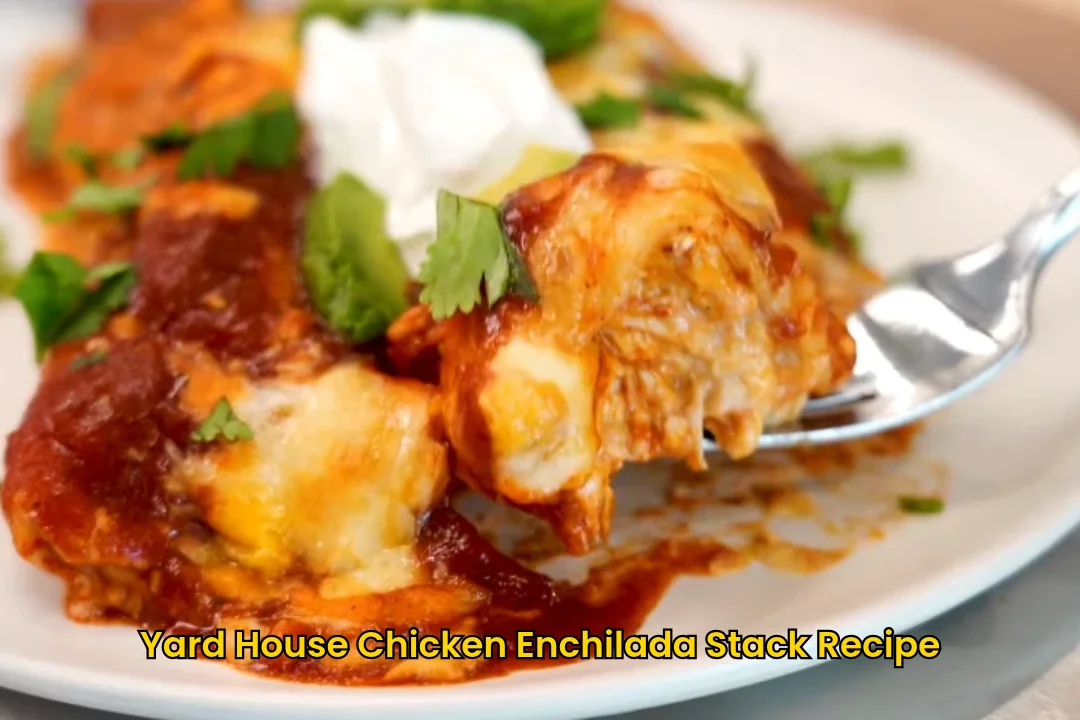
If you love the kind of cheesy, saucy Mexican-American comfort food you get at a popular restaurant like Yard House, this Yard House Chicken Enchilada Stack Recipe is the one I’d make when I want something hearty without making dinner complicated.
The creamy chicken filling is loaded with sautéed peppers, onion, tomatoes, cream cheese, and Mexican-blend cheese, then tucked into warm flour tortillas and baked under red enchilada sauce and more cheese.
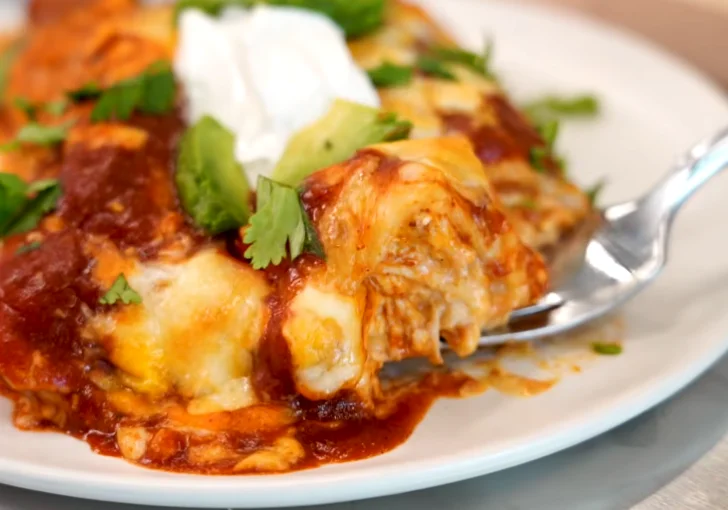
Serve your stack with cool sour cream, creamy avocado, and fresh cilantro for a dinner that feels restaurant-worthy right at home.
What Is a Yard House Chicken Enchilada Stack
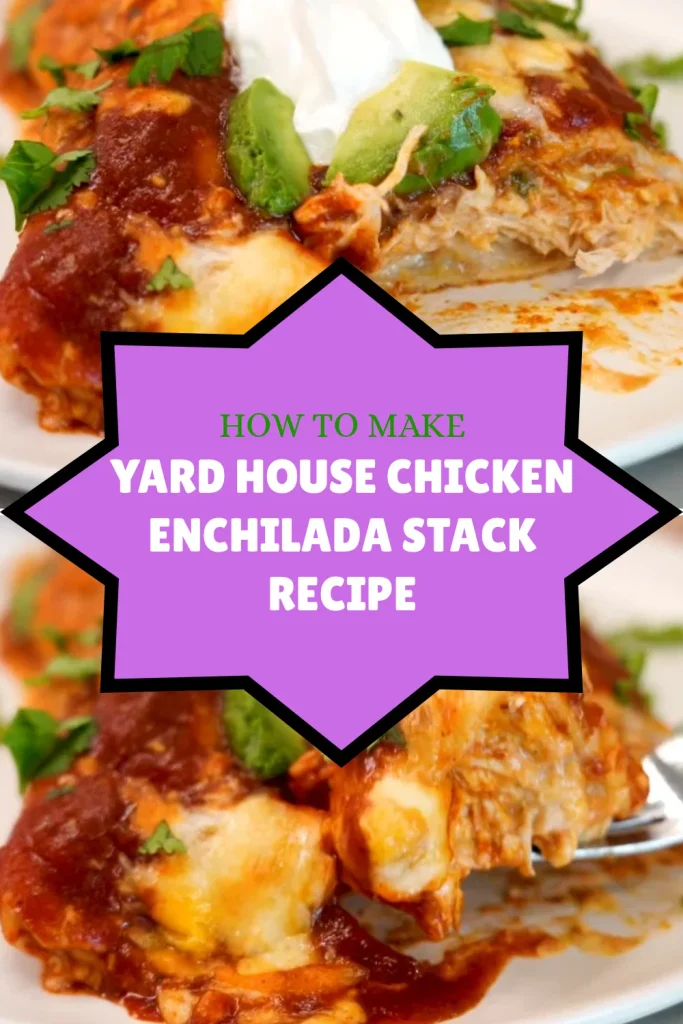
A Yard House Chicken Enchilada Stack is a cheesy, saucy chicken enchilada dish built around seasoned shredded chicken, creamy vegetables, flour tortillas, red enchilada sauce, and melted Mexican-blend cheese.
Instead of relying on plain shredded chicken, this version makes the filling rich and creamy with cream cheese and sour cream.
The poblano and green chiles add a gentle Southwestern kick, while the refried beans give the tortillas an extra layer of hearty flavor.
It has the comfort of traditional enchiladas but with a creamy restaurant-style filling that makes every bite especially satisfying.
Why You’ll Love This Chicken Enchilada Stack
This chicken enchilada stack has the best combination of creamy, cheesy, saucy, and slightly smoky flavors. I especially like that the filling is made from scratch without being fussy.
The vegetables soften first, then the cream cheese turns everything silky before the chicken and cheese are folded in. The tortillas stay tender under the enchilada sauce while the cheese on top gets bubbly and golden around the edges.
If you enjoy classic chicken enchiladas, creamy chicken burritos, or cheesy Mexican casseroles, this recipe gives you a little bit of all three in one pan.
Perfect For
- Easy family dinner: You can assemble the enchiladas ahead and bake them when everyone is ready to eat.
- Weekend comfort food: The creamy filling makes this feel a little more special than an ordinary weeknight casserole.
- Meal prep: Make the filling ahead, then assemble and bake when you need it.
- Mexican-inspired dinner night: Add rice, beans, salsa, and avocado for a complete spread.
- Using leftover chicken: Rotisserie chicken works beautifully when you want to skip the chicken-cooking step.
- Cheese lovers: There is cheese inside the filling and another generous layer melted over the top.
Ingredients You’ll Need
For the Chicken
- 2 pounds boneless, skinless chicken breasts: Chicken breast gives you plenty of tender meat for the filling. Pat it dry before seasoning so the spices stick well.
- 1 teaspoon chili powder: This gives the chicken a mild chili flavor without making it overwhelmingly spicy.
- 1 teaspoon ground cumin: Cumin adds that warm, earthy flavor you expect in a good enchilada filling.
- 1 teaspoon salt: Seasoning the chicken before cooking keeps the meat flavorful all the way through.
For the Creamy Chicken Filling
- 1 tablespoon olive oil: Use it to sauté the vegetables. Extra-virgin or regular olive oil both work.
- 1 medium yellow onion, diced: Yellow onion becomes sweet and tender as it cooks and gives the filling a solid savory base.
- 1 medium bell pepper, diced: Any color works, although red or yellow bell pepper adds a little extra sweetness.
- 1 small poblano pepper, seeded and diced: Poblano gives the filling a mild roasted-pepper character. Remove the seeds and ribs for less heat.
- 1 medium tomato, diced: Fresh tomato adds moisture and a little acidity to balance the creamy ingredients.
- 1 can (10 ounces) Rotel diced tomatoes and green chilies, drained slightly: This is an easy way to add tomatoes and green chile flavor. You don’t need to drain it completely because a little of the liquid helps the filling come together.
- 8 ounces cream cheese, softened: Softened cream cheese melts much more easily and creates the signature creamy texture.
- 1/2 cup sour cream: Sour cream adds tang and keeps the filling from tasting too heavy.
- 1 cup shredded Mexican-blend cheese, divided: Use a pre-shredded blend for convenience or shred your own for smoother melting.
- 1/2 teaspoon chili powder: A second layer of chili flavor goes directly into the creamy filling.
- 1/2 teaspoon ground cumin: This reinforces the warm seasoning from the chicken.
- 1/2 teaspoon salt: Add it with the other seasonings so the vegetables and creamy ingredients are properly balanced.
- 1/4 teaspoon black pepper: Just enough pepper to round out the savory flavors.
For Assembly
- 8 large flour tortillas: Large burrito-size tortillas are easiest to roll around the generous filling. Flour tortillas also stay soft and flexible in the oven.
- 2 tablespoons butter, softened: A very light coating helps the tortillas toast without becoming crisp.
- 1 cup refried beans, optional: Spread these inside the tortillas for extra richness and a heartier bite.
- 2 cups red enchilada sauce, divided: Most goes over the assembled enchiladas, while the rest can be saved for serving.
- 1 1/2 cups shredded Mexican-blend cheese: This creates the bubbly, gooey cheese topping.
For Serving
- Sour cream: A cool spoonful cuts through the richness of the hot enchiladas.
- Diced avocado: Avocado adds creamy freshness and a mild flavor that works especially well with the poblano and green chiles.
- Fresh cilantro, chopped: Cilantro gives the finished dish a fresh, bright finish.
Equipment You’ll Need
Large skillet: You’ll need enough room to sauté the vegetables and mix the entire creamy chicken filling.
Baking sheet: This holds the foil pouch while the chicken cooks.
Aluminum foil: It creates a sealed pouch that helps steam the chicken and keep it moist.
9-by-13-inch baking dish: This size gives the eight rolled enchiladas enough room to sit close together without being overcrowded.
Two forks: The simplest tool for shredding the cooked chicken into bite-size pieces.
Small bowl or spoon: Useful for portioning toppings such as sour cream and avocado when serving.
Pastry brush or butter knife: Either works for spreading a thin layer of softened butter over the tortillas.
How to Make Yard House Chicken Enchilada Stack
Step 1 – Season the Chicken: Pat the chicken breasts dry and season both sides with the chili powder, cumin, and salt. Place the seasoned chicken in a small foil pouch, sealing the edges well so the chicken can steam inside. This keeps the chicken moist while it cooks.
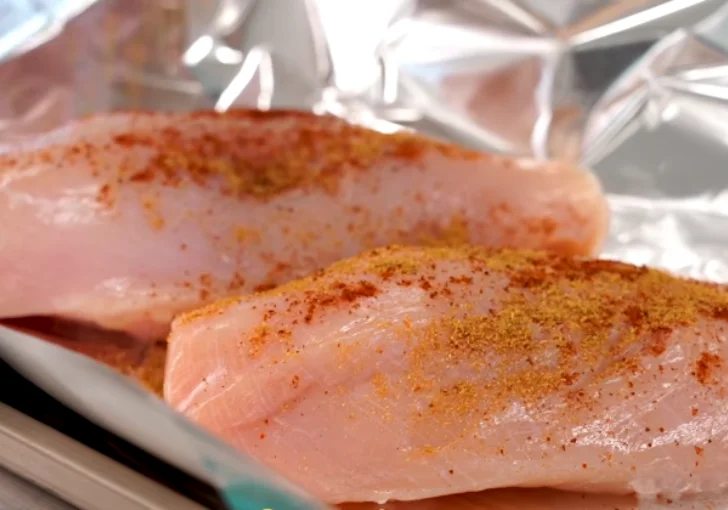
Step 2 – Cook the Chicken: Place the foil pouch on a baking sheet and cook in a 400°F oven for about 20 to 25 minutes, or until the chicken reaches 165°F in the thickest part. Remove the chicken from the pouch and let it cool enough to handle.
Step 3 – Shred the Chicken: Once the chicken has cooled slightly, shred it into bite-size pieces using two forks. Set the shredded chicken aside while you prepare the creamy vegetable filling. Rotisserie chicken can also be used as a shortcut in place of the cooked chicken breasts.
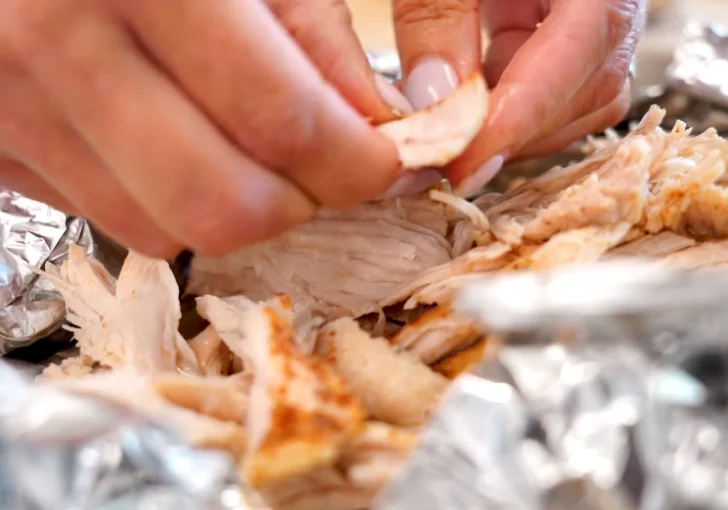
Step 4 – Sauté the Vegetables: Heat the olive oil in a large skillet over medium heat. Add the diced onion, bell pepper, and poblano pepper. Cook for about 5 to 7 minutes, stirring occasionally, until the vegetables soften. Add the diced tomato and cook for another 2 minutes.
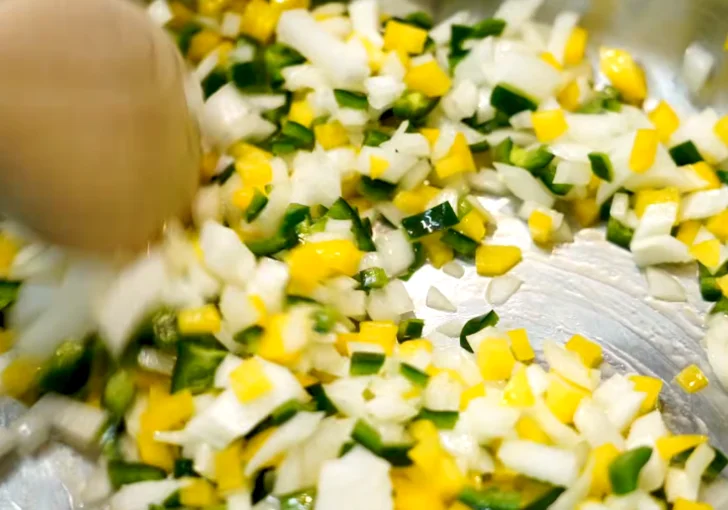
Step 5 – Season the Filling: Add the chili powder, cumin, salt, and black pepper to the vegetables. Stir well so the seasonings coat everything evenly. The vegetables form the main flavor base of the filling, so make sure they are well seasoned before adding the creamy ingredients.
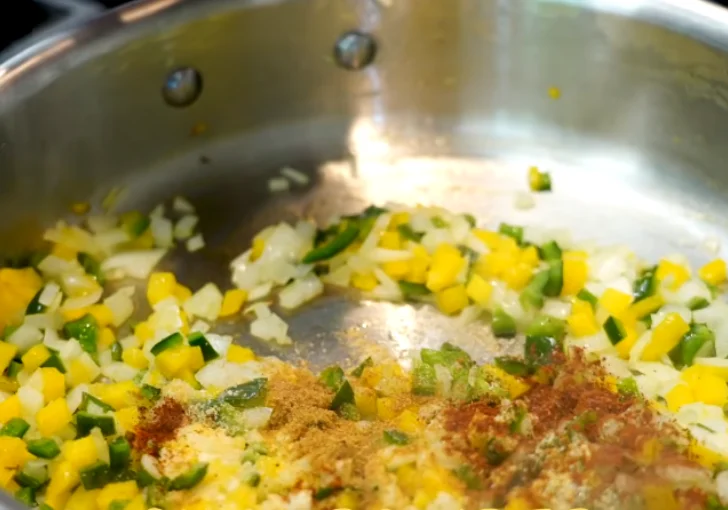
Step 6 – Make the Filling Creamy: Stir in the Rotel and softened cream cheese. Continue cooking and stirring until the cream cheese melts completely and the mixture becomes creamy and well combined. Lower the heat if needed to prevent the cream cheese from sticking.
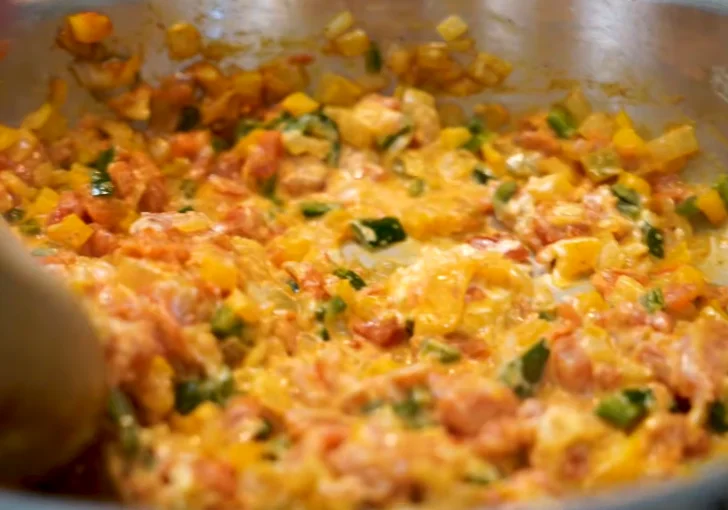
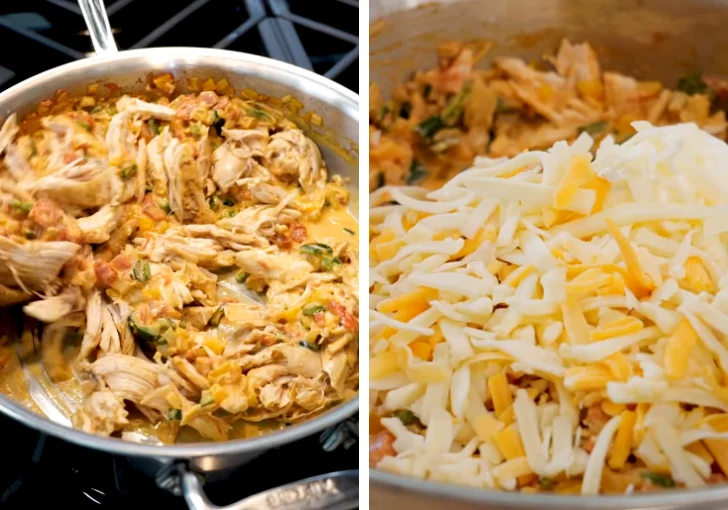
Step 7 – Add the Chicken and Cheese: Add the shredded chicken to the skillet and stir until it is evenly distributed throughout the creamy vegetable mixture. Stir in the sour cream and 1 cup of shredded cheese. Mix until the cheese melts into the filling and everything is creamy and combined. Taste and adjust the seasoning if needed.
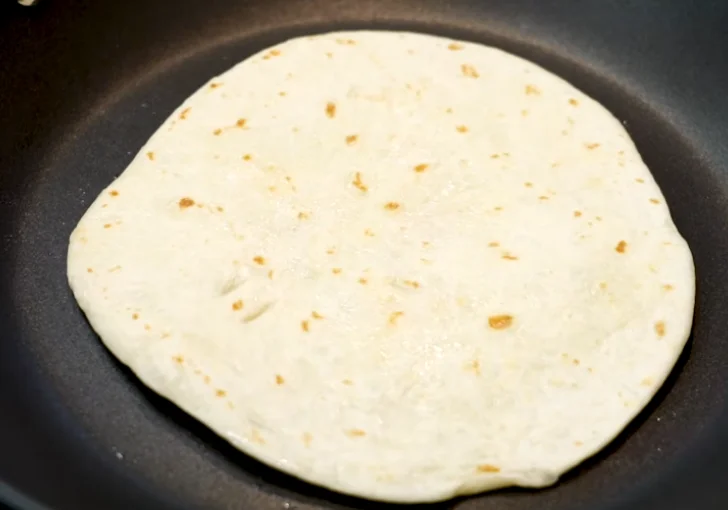
Step 8 – Toast the Tortillas: Lightly butter one side of each flour tortilla. Heat a clean skillet over medium heat and place each tortilla butter-side down. Toast for about 10 seconds on each side. You only want the tortillas lightly toasted so they become warm, flexible, and slightly richer in flavor without becoming crisp.
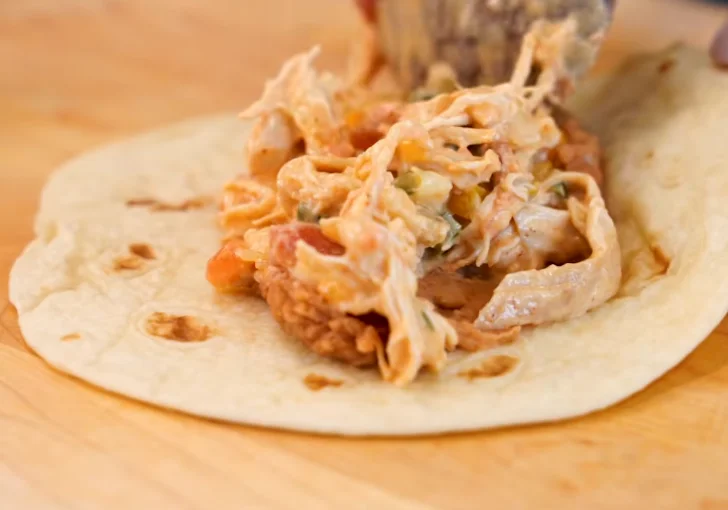
Step 9 – Fill the Tortillas: Spread a thin layer of refried beans down the center of each tortilla, if using. Add a generous scoop of the creamy chicken filling on top of the beans. Keep the filling centered so the tortillas are easier to roll.
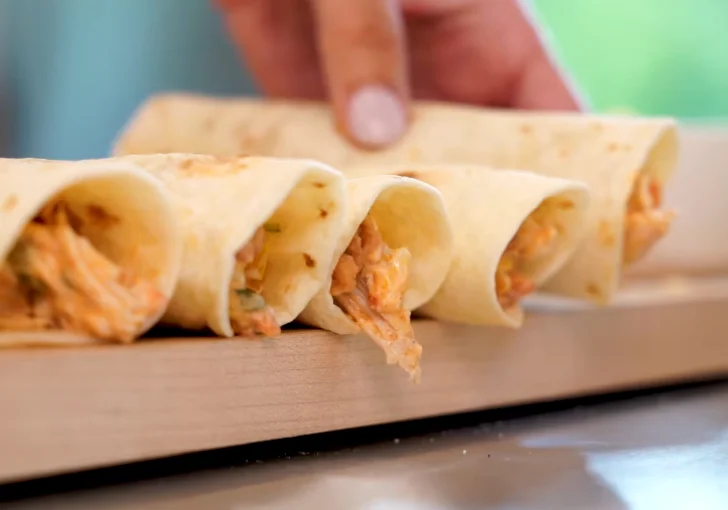
Step 10 – Roll the Enchiladas: Fold the sides of each tortilla toward the center, then roll it tightly from one end to the other. Place each rolled enchilada seam-side down in a lightly greased 9-by-13-inch baking dish. Arrange the enchiladas close together so they stay rolled while baking.
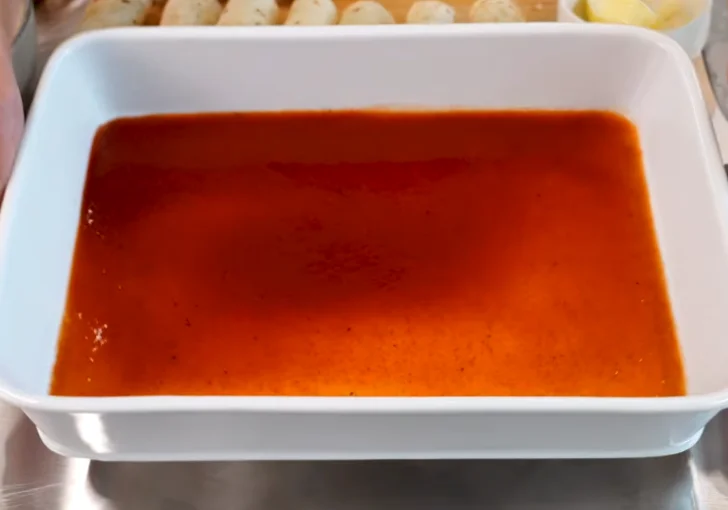
Step 11 – Add the Enchilada Sauce: Pour about 1 1/2 cups of the enchilada sauce evenly over the rolled tortillas, making sure the tops are well covered. Reserve about 1/2 cup of sauce if you want extra sauce for serving.
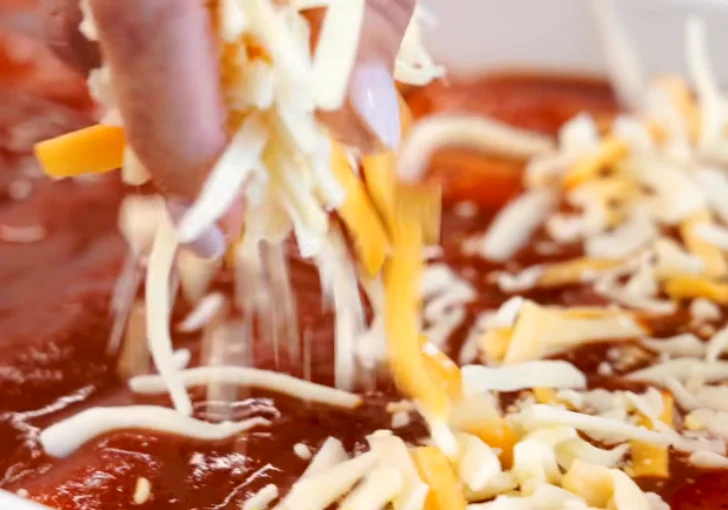
Step 12 – Top with Cheese: Sprinkle the remaining 1 1/2 cups of shredded cheese evenly over the sauced enchiladas. Cover the tops generously so the cheese melts into a bubbly, gooey layer as the enchiladas bake.
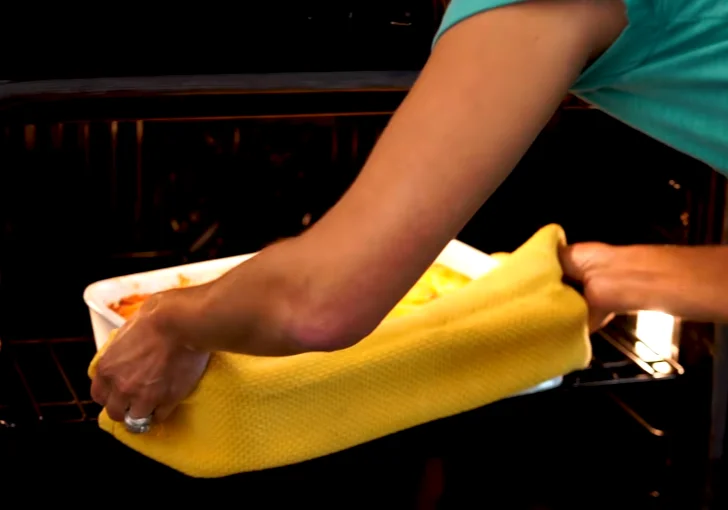
Step 13 – Bake the Enchiladas: Bake the enchiladas uncovered in a 375°F oven for about 20 to 25 minutes, until the sauce is bubbling around the edges and the cheese is completely melted. If the enchiladas were assembled ahead of time and refrigerated, cover the baking dish with foil and bake until heated through, then remove the foil and continue baking until the cheese is bubbly and melted.
Step 14 – Add the Toppings and Serve: Let the enchiladas rest for a few minutes before serving. Top each serving with a spoonful of sour cream, diced avocado, and chopped fresh cilantro. Add extra enchilada sauce if you like them especially saucy.
The Best Tips for Getting the Texture Right
Soften the cream cheese first. It melts into the vegetables much more smoothly than a cold block.
Don’t overcook the chicken. Pull it from the oven as soon as the thickest part reaches 165°F.
Keep the tortilla filling centered. Overfilling makes the tortillas harder to roll and more likely to split.
Don’t crisp the tortillas. Ten seconds per side is enough to make them flexible and lightly toasted.
Don’t skip the short resting time. Five minutes makes the filling easier to serve without falling apart.
Use enough sauce. Flour tortillas can absorb sauce quickly, so make sure the tops are generously covered before baking.
Can You Use Rotisserie Chicken
Absolutely. Rotisserie chicken is one of my favorite shortcuts for this recipe when I want to get dinner on the table faster.
Use about 2 pounds of shredded cooked chicken, removing the skin and bones first.
Since rotisserie chicken is already seasoned, taste the creamy filling before adding extra salt.
Flavor breakdown:
- Creamy: Cream cheese and sour cream make the chicken filling rich and smooth.
- Savory: Onion, bell pepper, chicken, and Mexican-blend cheese build the main savory flavor.
- Warm: Chili powder and cumin give the filling classic Southwestern seasoning.
- Mildly spicy: Poblano and green chiles add gentle heat without taking over.
- Fresh: Tomato, avocado, and cilantro keep the rich cheese and sauce balanced.
Common Mistakes to Avoid
Using cold cream cheese: It can stay lumpy and take much longer to blend. Let it sit at room temperature before cooking.
Overstuffing the tortillas: More filling sounds better, but too much makes the tortillas split or refuse to stay rolled.
Skipping the seam-side-down placement: Place every enchilada with the seam underneath so it stays closed as the cheese melts.
Making the tortillas crispy: Crisp tortillas can crack when you roll them. A quick toast is all you need.
Adding too much liquid from the Rotel: Drain it slightly. Too much liquid can make the creamy filling loose.
Cutting into them immediately: Give the baked enchiladas a few minutes to rest. Otherwise, the filling can slide out onto the plate.
Forgetting to season the filling: The cheese and cream ingredients mellow the spices, so taste the filling before rolling.
What to Serve With Chicken Enchilada Stack
Mexican Rice: A scoop of fluffy Mexican rice makes this meal feel like a full restaurant-style dinner. Keep the rice lightly seasoned so it doesn’t compete with the creamy enchilada filling. I like placing it beside the enchiladas rather than underneath them so the red sauce stays visible.
Black Beans: Black beans are an easy match when you want something hearty without adding another rich, cheesy side. Warm them with a little cumin and salt, then spoon them alongside the enchiladas. The earthy beans balance the creamy chicken filling nicely.
Fresh Guacamole: Cool guacamole works especially well with the hot enchiladas. The avocado brings a creamy texture of its own but tastes much fresher than the cheese-heavy filling. Add a little lime juice and chopped cilantro for a bright finish.
Simple Green Salad: A crisp salad gives your plate some much-needed freshness. Toss lettuce, cucumber, tomato, and avocado with a light lime dressing. The cool vegetables cut through the enchilada sauce and make the meal feel less heavy.
Corn and Black Bean Salsa: For a little sweetness and crunch, spoon a fresh corn and black bean salsa beside the enchiladas. The corn pairs beautifully with the roasted pepper flavors, while the beans make the side more filling without requiring much extra work.
How To Store Leftovers, Freeze & Reuse
Leftover: Let the enchiladas cool slightly, then refrigerate them in a tightly covered container within 2 hours of cooking. Keep leftovers refrigerated at 40°F or below and use them within 3 to 4 days. Reheat individual portions until the center reaches 165°F.
Freeze: For the best texture, freeze the assembled enchiladas before baking rather than freezing fully baked leftovers. Wrap the baking dish tightly in plastic wrap and foil, label it with the date, and freeze for up to 2 to 3 months. Thaw overnight in the refrigerator before baking.
Reuse: Reheat only the portion you plan to eat. For a softer result, add a spoonful of enchilada sauce before reheating. You can reheat covered in a 350°F oven until hot throughout, then uncover briefly to refresh the cheese on top. Avoid repeatedly cooling and reheating the entire dish.
Frequently Asked Questions
Can I make this chicken enchilada stack ahead of time?
Yes. You can assemble the enchiladas, cover the baking dish, and refrigerate it before baking. For the best results, bake within about 24 hours. Since the dish starts cold, give it extra time in the oven to heat through before uncovering it to melt and brown the cheese.
Can I use corn tortillas instead of flour tortillas?
You can, but the texture will be different. Corn tortillas have a stronger corn flavor and can crack more easily when rolled. If you prefer corn tortillas, warm them thoroughly before filling so they become flexible enough to roll without splitting.
How spicy is this recipe?
I’d call it mild to moderately spicy. The poblano and Rotel green chiles add noticeable pepper flavor, but the cream cheese, sour cream, and cheese mellow the heat. For a milder version, use mild Rotel and remove all the seeds and ribs from the poblano.
What is the best cheese for chicken enchiladas?
A Mexican-blend cheese is convenient and works very well here because it melts smoothly and adds plenty of flavor. You can also use Monterey Jack, cheddar, or a combination of the two. For the creamiest topping, shred the cheese yourself when you have the time.
Why did my enchiladas turn soggy?
The most common reasons are too much liquid in the filling, overly wet Rotel, or letting the tortillas sit in sauce for too long before baking. Drain the Rotel slightly, keep the filling creamy rather than watery, and bake the assembled enchiladas soon after adding the sauce.
Can I leave out the refried beans?
Yes. The refried beans are optional and mainly add extra body and flavor. The creamy chicken filling already makes these enchiladas hearty, so leaving the beans out won’t hurt the recipe. If you skip them, simply add the chicken filling directly to the tortilla.
How do I keep the enchiladas from falling apart?
Don’t overfill the tortillas, warm them just enough to make them flexible, and roll them tightly. Place every enchilada seam-side down in the baking dish and arrange them close together. The sauce and melted cheese will help hold everything together as the dish bakes.
Yard House Chicken Enchilada Stack Recipe
Ingredients
- For the Chicken
- 2 pounds boneless skinless chicken breasts
- 1 teaspoon chili powder
- 1 teaspoon ground cumin
- 1 teaspoon salt
- For the Creamy Chicken Filling
- 1 tablespoon olive oil
- 1 medium yellow onion diced
- 1 medium bell pepper diced
- 1 small poblano pepper seeded and diced
- 1 medium tomato diced
- 1 can 10 ounces Rotel diced tomatoes and green chilies, drained slightly
- 8 ounces cream cheese softened
- 1/2 cup sour cream
- 1 cup shredded Mexican-blend cheese divided
- 1/2 teaspoon chili powder
- 1/2 teaspoon ground cumin
- 1/2 teaspoon salt
- 1/4 teaspoon black pepper
- For Assembly
- 8 large flour tortillas
- 2 tablespoons butter softened
- 1 cup refried beans optional
- 2 cups red enchilada sauce divided
- 1 1/2 cups shredded Mexican-blend cheese
- For Serving
- Sour cream
- Diced avocado
- Chopped fresh cilantro
Instructions
- Step 1 – Season the Chicken: Pat the chicken breasts dry and season both sides with the chili powder, cumin, and salt. Place the seasoned chicken in a small foil pouch, sealing the edges well so the chicken can steam inside. This keeps the chicken moist while it cooks.
- Step 2 – Cook the Chicken: Place the foil pouch on a baking sheet and cook in a 400°F oven for about 20 to 25 minutes, or until the chicken reaches 165°F in the thickest part. Remove the chicken from the pouch and let it cool enough to handle.
- Step 3 – Shred the Chicken: Once the chicken has cooled slightly, shred it into bite-size pieces using two forks. Set the shredded chicken aside while you prepare the creamy vegetable filling. Rotisserie chicken can also be used as a shortcut in place of the cooked chicken breasts.
- Step 4 – Sauté the Vegetables: Heat the olive oil in a large skillet over medium heat. Add the diced onion, bell pepper, and poblano pepper. Cook for about 5 to 7 minutes, stirring occasionally, until the vegetables soften. Add the diced tomato and cook for another 2 minutes.
- Step 5 – Season the Filling: Add the chili powder, cumin, salt, and black pepper to the vegetables. Stir well so the seasonings coat everything evenly. The vegetables form the main flavor base of the filling, so make sure they are well seasoned before adding the creamy ingredients.
- Step 6 – Make the Filling Creamy: Stir in the Rotel and softened cream cheese. Continue cooking and stirring until the cream cheese melts completely and the mixture becomes creamy and well combined. Lower the heat if needed to prevent the cream cheese from sticking.
- Step 7 – Add the Chicken and Cheese: Add the shredded chicken to the skillet and stir until it is evenly distributed throughout the creamy vegetable mixture. Stir in the sour cream and 1 cup of shredded cheese. Mix until the cheese melts into the filling and everything is creamy and combined. Taste and adjust the seasoning if needed.
- Step 8 – Toast the Tortillas: Lightly butter one side of each flour tortilla. Heat a clean skillet over medium heat and place each tortilla butter-side down. Toast for about 10 seconds on each side. You only want the tortillas lightly toasted so they become warm, flexible, and slightly richer in flavor without becoming crisp.
- Step 9 – Fill the Tortillas: Spread a thin layer of refried beans down the center of each tortilla, if using. Add a generous scoop of the creamy chicken filling on top of the beans. Keep the filling centered so the tortillas are easier to roll.
- Step 10 – Roll the Enchiladas: Fold the sides of each tortilla toward the center, then roll it tightly from one end to the other. Place each rolled enchilada seam-side down in a lightly greased 9-by-13-inch baking dish. Arrange the enchiladas close together so they stay rolled while baking.
- Step 11 – Add the Enchilada Sauce: Pour about 1 1/2 cups of the enchilada sauce evenly over the rolled tortillas, making sure the tops are well covered. Reserve about 1/2 cup of sauce if you want extra sauce for serving.
- Step 12 – Top with Cheese: Sprinkle the remaining 1 1/2 cups of shredded cheese evenly over the sauced enchiladas. Cover the tops generously so the cheese melts into a bubbly, gooey layer as the enchiladas bake.
- Step 13 – Bake the Enchiladas: Bake the enchiladas uncovered in a 375°F oven for about 20 to 25 minutes, until the sauce is bubbling around the edges and the cheese is completely melted. If the enchiladas were assembled ahead of time and refrigerated, cover the baking dish with foil and bake until heated through, then remove the foil and continue baking until the cheese is bubbly and melted.
- Step 14 – Add the Toppings and Serve: Let the enchiladas rest for a few minutes before serving. Top each serving with a spoonful of sour cream, diced avocado, and chopped fresh cilantro. Add extra enchilada sauce if you like them especially saucy.