Yard House Brussels Sprouts Recipe (Restaurant-Crisp in One Pan)
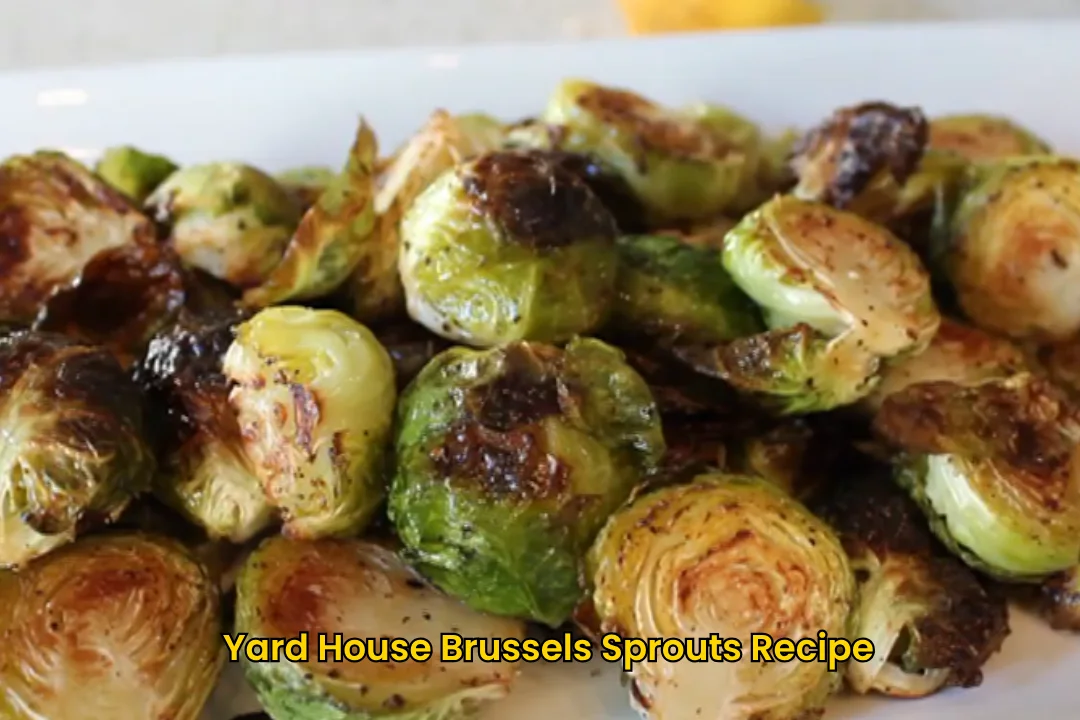
Brussels sprouts have come a long way from the soft, overcooked vegetable that used to get pushed around the dinner plate. Roast them properly, though, and they become something completely different. The outside turns crisp and deeply browned, the loose leaves almost melt into little chips, and the centers stay tender without becoming mushy.
That contrast is what makes this Yard House Brussels Sprouts Recipe so good. You get caramelized edges, plenty of garlic, and a layer of salty Parmesan that finishes everything off without covering up the flavor of the sprouts themselves.
This Yard House brussels sprouts dish is one of my most favourite sides among their menu. I like making it at home because you can get that same kind of crispy, shareable side dish with a short ingredient list and without dealing with a fryer or complicated preparation.
Serve these Yard house Brussels sprouts made at home alongside steak, chicken, or salmon, or put the whole bowl in the middle of the table and let everyone go after the crispy pieces first.
What Size Brussels Sprouts Work Best
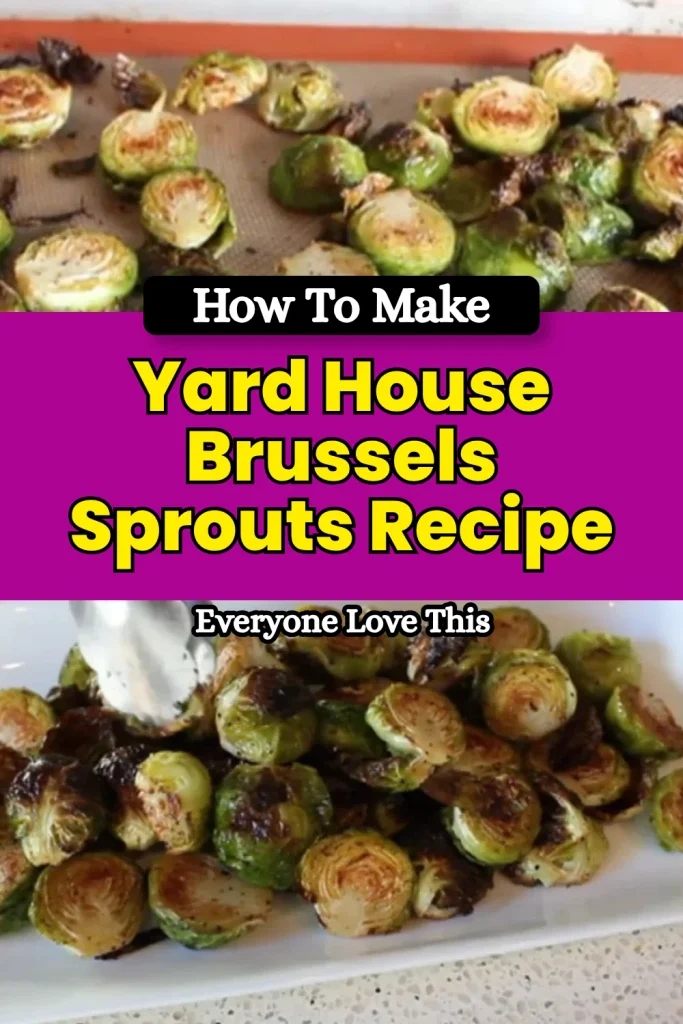
Small to medium Brussels sprouts work best because they cook more evenly and tend to develop a slightly sweeter flavor with a tender center and crispy outer leaves.
I usually avoid very large sprouts unless I cut them into quarters because oversized Brussels sprouts can brown too much on the outside before the middle becomes tender.
Try to choose sprouts that are fairly similar in size. They do not need to be perfectly identical, but a tray filled with tiny sprouts, medium sprouts, and a few giant ones will cook unevenly.
Look for firm, tightly packed leaves with a fresh green color. A few loose outer leaves are completely fine, and you should actually save the clean ones that fall off while trimming because they turn wonderfully crisp in the oven.
If you only have large Brussels sprouts, simply quarter them through the stem instead of cutting them in half. This gives you more flat surfaces for browning and helps everything finish cooking at about the same time.
Can You Use Frozen Brussels Sprouts
Yes, you can use frozen Brussels sprouts, but fresh Brussels sprouts will give you the best crispy, restaurant-style texture for this recipe. Frozen sprouts release much more moisture as they cook, so they are more likely to become soft or steamed instead of developing the dark, caramelized edges that make roasted Brussels sprouts so good.
If frozen Brussels sprouts are what you have, roast them directly from frozen rather than thawing them first. Thawing can make them even wetter. Spread them across the baking sheet, use enough space between the pieces, and expect the cooking time to be a little longer. You may also want to drain away excess moisture if it collects on the pan.
For the closest homemade version of that crisp restaurant-style result, though, I recommend starting with fresh sprouts. The dry outer leaves can blister, the cut sides can caramelize against the hot pan, and the centers stay pleasantly tender. Frozen sprouts are still useful for a quick side dish, but fresh ones are definitely my first choice when texture is the goal.
Perfect For
Think of these crispy Brussels sprouts as the kind of side dish that quietly steals attention from the main course.
- Your steakhouse-style dinner at home when you want something richer than an ordinary vegetable side.
- A quick weeknight upgrade because most of the work is done by the oven.
- Holiday dinner tables where you need a vegetable that does not feel boring.
- Sharing as a warm appetizer with toothpicks or small plates for everyone at the table.
- Chicken, salmon, pork, or steak nights when you want something crispy and savory alongside the main dish.
- Brussels sprouts skeptics because the caramelized edges taste very different from boiled or steamed sprouts.
Yard House Brussels Sprouts Ingredients
1½ pounds small to medium Brussels sprouts: Fresh Brussels sprouts are the best choice here. Look for firm sprouts with tightly packed leaves and avoid any that feel soft or smell strongly sulfurous. Small and medium sprouts roast more evenly, and similar-sized pieces make it easier to get the whole tray done at the same time.
2 tablespoons olive oil or avocado oil: Either works well. I like olive oil for its flavor, while avocado oil has a higher smoke point and works nicely at 425°F. You only need enough oil to lightly coat the sprouts; too much can make them greasy instead of crisp.
½ teaspoon salt, or to taste: Regular kosher salt or fine sea salt both work. If you are using finely grated Parmesan, remember that the cheese adds saltiness too, so you can always start with a little less and adjust after roasting.
¼ teaspoon black pepper, or to taste: Freshly ground black pepper gives the best flavor, but pre-ground pepper is perfectly fine. This amount adds gentle warmth without taking over the dish.
2 cloves garlic, finely minced: Fresh garlic is my preferred choice because it gives the finished sprouts a warm, savory flavor. Mince it finely so it spreads evenly. Adding it near the end is important because garlic can burn quickly at high heat.
¼ cup grated Parmesan cheese: Use finely grated Parmesan rather than large shreds if you want it to melt and lightly toast around the sprouts. Freshly grated cheese gives the best flavor, although a good-quality store-bought grated Parmesan will also work.
Kitchen Equipment You’ll Need
- Large rimmed baking sheet: A large sheet pan gives the Brussels sprouts enough room to roast. Crowding them too closely traps steam, which is one of the fastest ways to lose those crispy edges.
- Sharp chef’s knife: You will use this to trim the stem ends and slice the Brussels sprouts cleanly in half. A dull knife can crush the sprouts instead of giving you neat pieces.
- Cutting board: A stable cutting board makes trimming and halving a pound and a half of Brussels sprouts much easier and safer.
- Large bowl, optional: You can toss the sprouts directly on the baking sheet, but a bowl gives you a little more room if you prefer to mix the oil and seasonings before arranging everything cut-side down.
- Clean kitchen towel, paper towels, or salad spinner: Drying the sprouts well is one of the most important parts of the recipe. Moisture creates steam, and steam is the enemy of crisp roasted vegetables.
- Spatula or tongs: These make it easier to transfer the finished sprouts to a serving bowl without leaving all of the crispy loose leaves behind on the pan.
How To Make Yard House Brussels Sprouts
Step 1 – Preheat the Oven
Preheat your oven to 425°F (220°C). Position a rack in the middle of the oven and have a large baking sheet ready. A hot oven is important because it helps the Brussels sprouts develop deeply golden, crispy edges while staying tender inside.
Step 2 – Wash and Dry the Brussels Sprouts
Rinse the Brussels sprouts thoroughly under cold water to remove any dirt or debris. Dry them completely with a clean kitchen towel, paper towels, or a salad spinner. Take your time with this step because any moisture left on the sprouts can cause them to steam instead of roast, which will prevent the edges from becoming properly crisp.
Step 3 – Trim and Slice the Brussels Sprouts
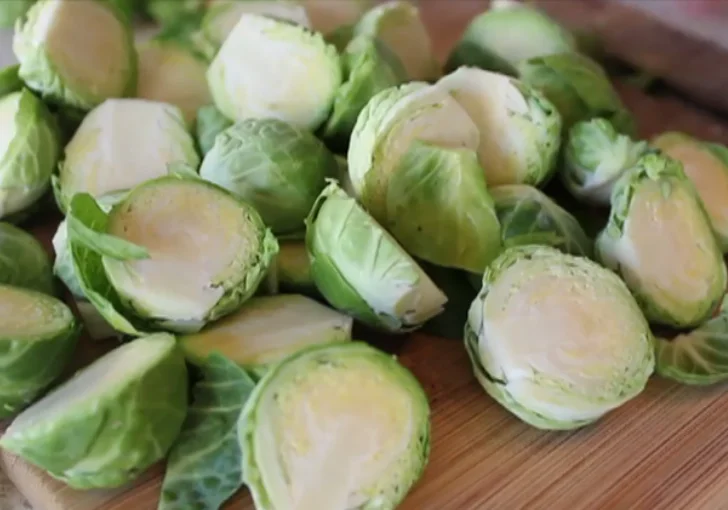
Use a sharp knife to cut a very small amount from the stem end of each Brussels sprout. Be careful not to remove too much of the base, as cutting too deeply can cause all of the leaves to fall apart. Slice each Brussels sprout in half from top to bottom. Remove and discard any outer leaves that are damaged or dirty, but keep any clean leaves that naturally come loose because they will become especially crispy in the oven.
Step 4 – Season the Brussels Sprouts
Place the halved Brussels sprouts and all of the loose leaves directly onto the baking sheet. Drizzle with the olive oil or avocado oil, then sprinkle with the salt and black pepper. Use your hands to toss everything together until the Brussels sprouts are lightly and evenly coated with the oil and seasonings.
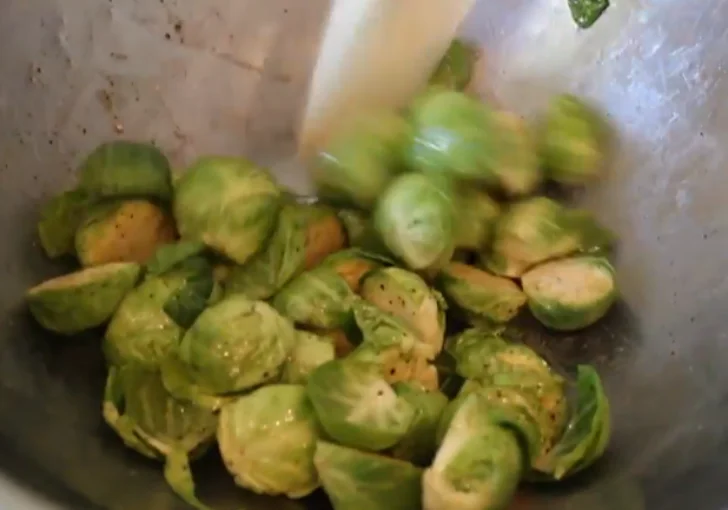
Step 5 – Arrange Cut Side Down
Turn each Brussels sprout so the cut side is facing down against the baking sheet. Scatter the loose leaves around and between the sprouts. Keeping the cut sides directly against the hot baking sheet helps create the golden, caramelized surface that gives the roasted Brussels sprouts their rich flavor and restaurant-style texture.
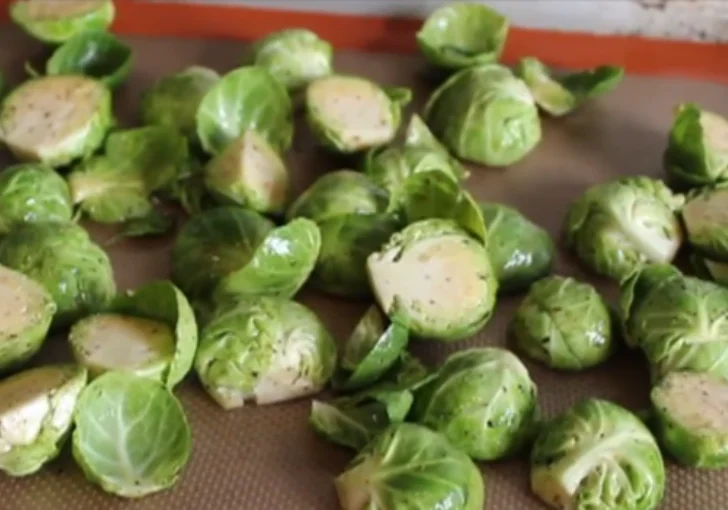
Step 6 – Start Roasting
Place the baking sheet in the preheated oven and roast the Brussels sprouts for about 20 to 25 minutes. About halfway through the cooking time, rotate the baking sheet so the sprouts cook more evenly. Leave the Brussels sprouts in their cut-side-down position rather than tossing them.
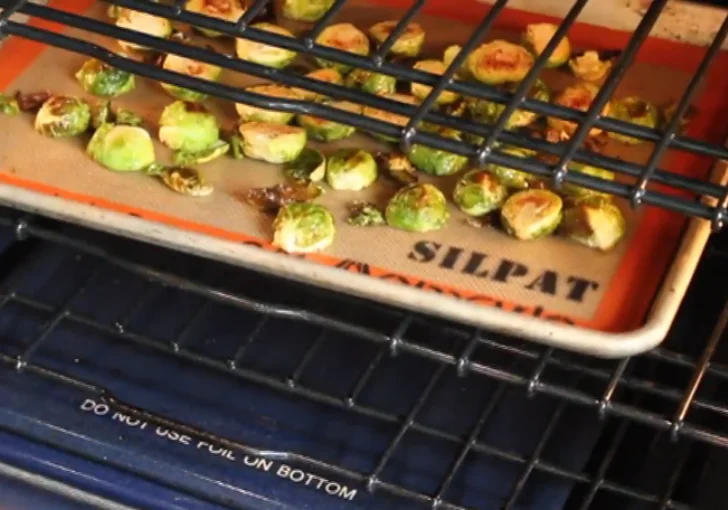
Step 7 – Add the Garlic and Parmesan
A few minutes before the Brussels sprouts are finished roasting, carefully remove the baking sheet from the oven. Sprinkle the finely minced garlic and grated Parmesan cheese over the sprouts. Gently toss just enough to distribute the garlic and cheese, then return everything to the oven.
Step 8 – Finish Roasting Until Crisp
Continue roasting for another 3 to 5 minutes, or until the Brussels sprouts are tender inside and the edges are golden to dark brown and crispy. The Parmesan should be melted and lightly toasted, while the garlic should become fragrant without burning. You should see a mix of golden, dark brown, and green areas, which gives the finished dish a combination of crispy and tender textures.
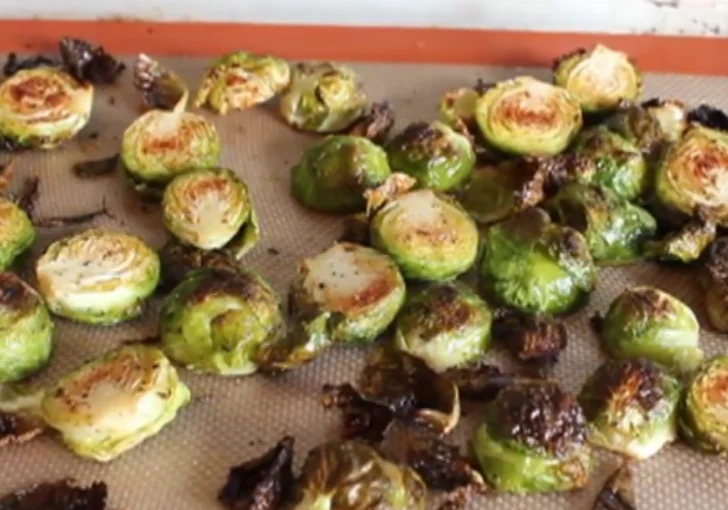
Step 9 – Serve Hot
Transfer the roasted Brussels sprouts and all of the crispy loose leaves to a serving bowl. Serve immediately while the edges are still crisp and the Parmesan is warm. For the best texture, enjoy the Brussels sprouts straight from the oven.
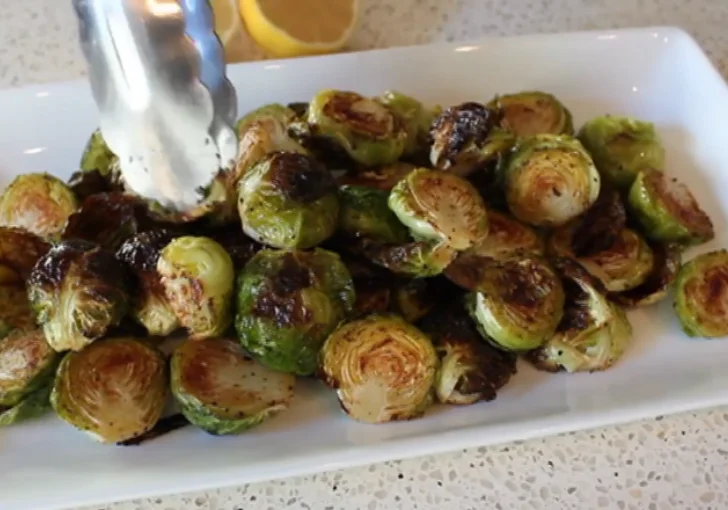
The 5 Secrets to Crispy Brussels Sprouts
Dry them completely: Water turns to steam in the oven, and steamed Brussels sprouts will never develop the same crisp exterior.
Use a hot oven: 425°F gives you enough heat to brown the edges while the inside becomes tender.
Do not overcrowd the pan: Give the sprouts breathing room. When too many pieces are packed together, moisture gets trapped between them.
Keep the cut side down: That flat surface gets direct contact with the hot baking sheet and develops deeper caramelization.
Add garlic near the end: Garlic can burn quickly at high temperatures. Adding it during the final few minutes gives you flavor without the bitter taste of burnt garlic.
Yard House Brussels Sprouts Flavor Variations
Once you have the basic crispy Brussels sprouts down, you can easily change the flavor without changing the roasting method. I like to keep the hot oven and cut-side-down technique the same, then add a few ingredients that take the dish in a different direction.
The finished sprouts already have a savory, nutty flavor from the Parmesan and caramelization, so a small change can make them taste closer to a sweet-and-spicy appetizer, a steakhouse side, or another bold restaurant-style vegetable dish.
- Sweet and Spicy: Add a light drizzle of hot honey after roasting. You get crispy, salty sprouts with a sweet finish and a little heat.
- Balsamic Parmesan: Finish with a small drizzle of balsamic glaze for tangy sweetness that works especially well with the nutty Parmesan.
- Lemon Garlic: Add fresh lemon zest and a squeeze of lemon juice just before serving. I like this version with grilled salmon or chicken because the citrus keeps the dish feeling lighter.
- Bacon and Parmesan: Stir in crisp cooked bacon after roasting. The smoky, salty pieces make the sprouts feel more like a classic steakhouse side.
- Red Pepper and Garlic: Add a pinch of crushed red pepper flakes with the garlic for gentle heat. Start small because the goal is a warm finish, not a bowl that overwhelms the Brussels sprouts.
- Maple Parmesan: A very light drizzle of maple syrup after roasting creates a sweet-and-savory contrast, especially when you also add a pinch of black pepper.
Mistakes To Avoid With Yard House Brussels Sprouts
Starting with wet Brussels sprouts: If they go onto the tray wet, they will steam first. I have found that even a few extra minutes spent drying them can make a noticeable difference in the finished texture.
Using a crowded baking sheet: A packed tray creates softer sprouts. If you cannot see a little space between most of the pieces, divide them between two pans.
Cutting off too much of the stem: Removing too much of the base causes the leaves to separate completely before roasting. Trim only the dry end.
Using low oven heat: At a lower temperature, the sprouts may cook through before developing enough color. For this recipe, the higher heat is part of what creates that restaurant-style flavor.
Adding garlic too early: Garlic roasted for the entire cooking time at 425°F can become dark and bitter. Add it during the final few minutes instead.
Overcooking until every leaf is black: Some dark edges are delicious, but completely blackened sprouts can taste bitter. You are looking for a mix of caramelized brown surfaces, crisp leaves, and tender green centers.
What To Serve with Yard House Brussels Sprouts
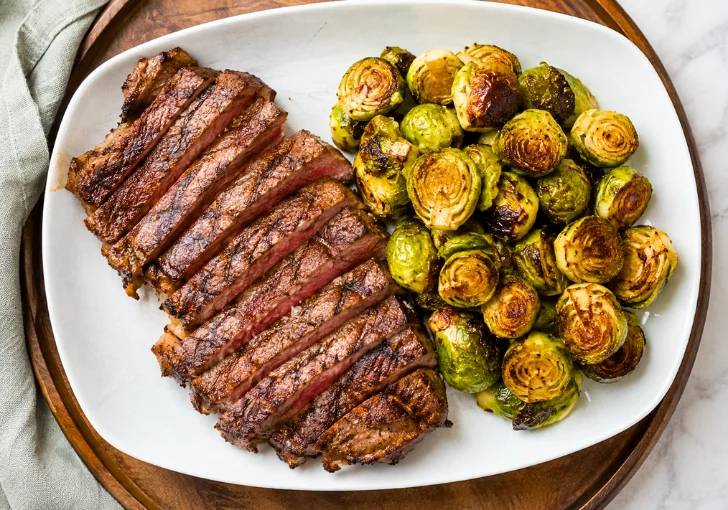
Grilled or Pan-Seared Steak: The crispy Parmesan edges work beautifully next to a juicy steak. I like serving the sprouts on one side of the plate rather than stacking them under the meat so they stay crisp instead of soaking up the steak juices.
Roasted or Grilled Chicken: Chicken keeps the meal simple while the Brussels sprouts bring plenty of flavor. A spoonful of pan juices can go beside the chicken, but keep it away from the sprouts if you want to protect their crispy texture.
Baked or Pan-Seared Salmon: The slightly sweet, caramelized flavor of roasted Brussels sprouts pairs nicely with rich salmon. Add a little lemon to both the fish and the sprouts, then serve them side by side for a fresh, balanced plate.
Creamy Pasta: If you are serving a rich pasta, these sprouts add a welcome crisp element. I would place them in a separate bowl or alongside the pasta instead of mixing them directly into the sauce.
A Restaurant-Style Appetizer Spread: Serve the Brussels sprouts with other shareable dishes such as crispy potatoes, chicken bites, or a simple cheese board. Pile the sprouts high on a warm platter and make sure those crunchy loose leaves are visible on top.
How To Store Leftovers, Freeze & Reheat
Leftover: Let the Brussels sprouts cool, then store them in an airtight container in the refrigerator for up to 3 to 4 days. For food safety, refrigerate leftovers within 2 hours of serving. Keep in mind that the sprouts will soften in the refrigerator, which is normal.
Freeze: You can freeze cooked Brussels sprouts, although the texture will become softer after thawing. Store them in a freezer-safe container or bag for up to 2 months for the best quality. Freeze them only after they have cooled completely.
Reuse: Reheat refrigerated sprouts in a 400°F oven or air fryer until hot and crisp around the edges again. Avoid the microwave if crispness is your priority. You can also chop leftover sprouts and add them to an omelet, grain bowl, or breakfast hash.
FAQs
Do I need to boil Brussels sprouts before roasting them?
No, you do not need to boil them first. Roasting them raw gives you a better chance of getting crispy edges and caramelized flavor. Boiling adds moisture and can make the sprouts softer, which works against the texture this recipe is trying to achieve.
Why are my roasted Brussels sprouts not crispy?
The most common reasons are excess moisture, overcrowding, or an oven that is not hot enough. Dry the sprouts thoroughly, give them space on the pan, and roast them at 425°F. Keeping the cut sides against the baking sheet also helps create better browning.
Can I use pre-shredded or grated Parmesan cheese?
Yes. Pre-grated Parmesan is convenient and will still add savory flavor. Freshly grated Parmesan usually melts and browns a little better, but use what works for you. Just avoid very large, thick shreds if you want the cheese to coat the sprouts more evenly.
Can I make these Brussels sprouts ahead of time?
You can wash, dry, trim, and halve the Brussels sprouts a day ahead and store them in an airtight container in the refrigerator. For the best texture, wait to roast them until shortly before serving. Freshly roasted sprouts will always be crispier than fully cooked ones that are reheated.
Should I use olive oil or avocado oil?
Either is a good choice. Olive oil adds a familiar savory flavor, while avocado oil handles high heat very well and has a more neutral taste. I would choose based on what you already have in your kitchen because both will roast the Brussels sprouts nicely.
Can I make this recipe dairy-free?
Yes. Simply leave out the Parmesan or replace it with your preferred dairy-free Parmesan-style alternative. The Brussels sprouts will still become crispy and flavorful from the oil, garlic, salt, pepper, and caramelization.
How do I know when Brussels sprouts are done?
They should be tender enough to pierce easily with a fork, but not mushy. The cut sides and outer leaves should have visible golden to dark brown caramelization. If they are still firm in the center, return them to the oven for a few more minutes and check again.
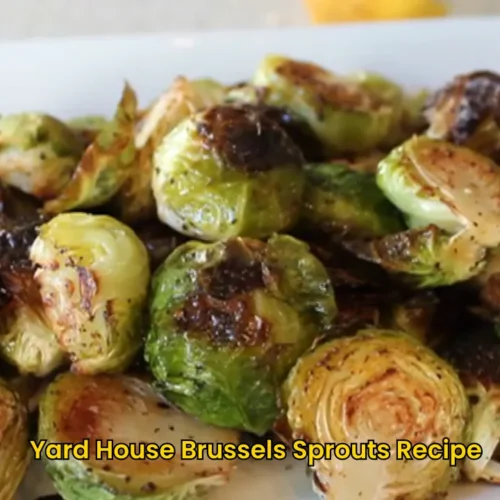
Yard House Brussels Sprouts Recipe
Ingredients
- 1½ pounds small to medium Brussels sprouts
- 2 tablespoons olive oil or avocado oil
- ½ teaspoon salt or to taste
- ¼ teaspoon black pepper or to taste
- 2 cloves garlic finely minced
- ¼ cup grated Parmesan cheese
Instructions
- Step 1 – Preheat the Oven: Preheat your oven to 425°F (220°C). Position a rack in the middle of the oven and have a large baking sheet ready. A hot oven is important because it helps the Brussels sprouts develop deeply golden, crispy edges while staying tender inside.
- Step 2 – Wash and Dry the Brussels Sprouts: Rinse the Brussels sprouts thoroughly under cold water to remove any dirt or debris. Dry them completely with a clean kitchen towel, paper towels, or a salad spinner. Take your time with this step because any moisture left on the sprouts can cause them to steam instead of roast, which will prevent the edges from becoming properly crisp.
- Step 3 – Trim and Slice the Brussels Sprouts: Use a sharp knife to cut a very small amount from the stem end of each Brussels sprout. Be careful not to remove too much of the base, as cutting too deeply can cause all of the leaves to fall apart. Slice each Brussels sprout in half from top to bottom. Remove and discard any outer leaves that are damaged or dirty, but keep any clean leaves that naturally come loose because they will become especially crispy in the oven.
- Step 4 – Season the Brussels Sprouts: Place the halved Brussels sprouts and all of the loose leaves directly onto the baking sheet. Drizzle with the olive oil or avocado oil, then sprinkle with the salt and black pepper. Use your hands to toss everything together until the Brussels sprouts are lightly and evenly coated with the oil and seasonings.
- Step 5 – Arrange Cut Side Down: Turn each Brussels sprout so the cut side is facing down against the baking sheet. Scatter the loose leaves around and between the sprouts. Keeping the cut sides directly against the hot baking sheet helps create the golden, caramelized surface that gives the roasted Brussels sprouts their rich flavor and restaurant-style texture.
- Step 6 – Start Roasting: Place the baking sheet in the preheated oven and roast the Brussels sprouts for about 20 to 25 minutes. About halfway through the cooking time, rotate the baking sheet so the sprouts cook more evenly. Leave the Brussels sprouts in their cut-side-down position rather than tossing them.
- Step 7 – Add the Garlic and Parmesan: A few minutes before the Brussels sprouts are finished roasting, carefully remove the baking sheet from the oven. Sprinkle the finely minced garlic and grated Parmesan cheese over the sprouts. Gently toss just enough to distribute the garlic and cheese, then return everything to the oven.
- Step 8 – Finish Roasting Until Crisp: Continue roasting for another 3 to 5 minutes, or until the Brussels sprouts are tender inside and the edges are golden to dark brown and crispy. The Parmesan should be melted and lightly toasted, while the garlic should become fragrant without burning. You should see a mix of golden, dark brown, and green areas, which gives the finished dish a combination of crispy and tender textures.
- Step 9 – Serve Hot: Transfer the roasted Brussels sprouts and all of the crispy loose leaves to a serving bowl. Serve immediately while the edges are still crisp and the Parmesan is warm. For the best texture, enjoy the Brussels sprouts straight from the oven.